My blog is very new so putting up info is a bit challanging for me. I am having to handle some of life's tuff stuff at this point in time. I am hoping to limp along with my blog for a while and then when things settle down I can focus on building. In the remote chance that you should stop by........Thank You, please maintain your link to me and we will keep an eye on each other.
Smiles
Jami
Thursday, March 19, 2009


Friday, March 13, 2009
Rose Quilted Wallhanging

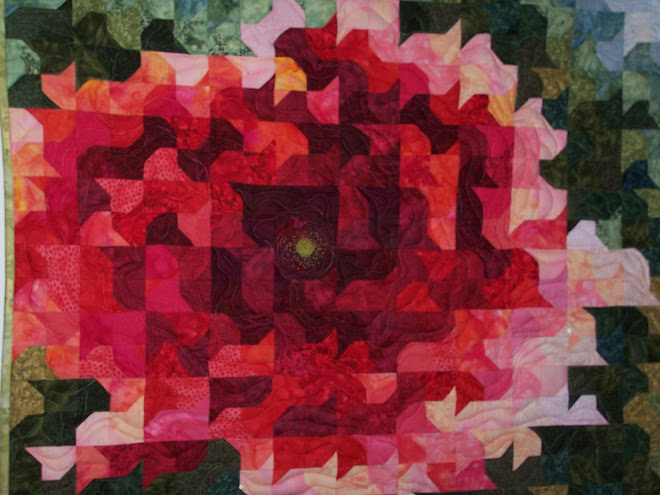
The rose Quilt in the introduction to this blog is a quilted wall hanging.
I remember a time when I said, "A quilt on the wall, What the heck would you want to put a quilt on the wall for? Oh My, I have had to eat my words a few times in my life. I have sense learned to say, " That is not where my interest is at this time." (Smile) I now know that I may be drawn to try something, that I might never have thought I would find myself doing, at any point in time. So is the Creative, Artistic nature of the beast.
I took a course a to do this Rose Quilted Wall Hanging. The course was called tessellating hydrangea,(How did I get a rose out of that?) I got a little off course I might say, (smile) which is pretty common for me. When the creative juices start to flow you never know where they will end up. The Tessellating Hydrangea, was a basic Basic tessellation, created by using sets of four small blocks and four protruding points that blended one quilt block into another(If you look at my quilted rose wall hanging, you may still be able to pick out a set of four small squares, that seem to look almost like a four leaf clover)(I see one just below the flower center and slightly to the right). The groupings of four blocks and points are intended to create the impression of the small flowers of a hydrangea, the bunches of small flowers make up a single hydrangea head.
What I did was treat each block and triangle point as an individual piece, I then arranged them on a quilters design wall to create the impression of a rose. This was a very good exercise for me, as I have always been caught up in to many details, This way all I had was small squares and triangle points, and with those my goal was to create the impression of a Rose. I had a lot of fun arranging and rearranging the bits and pieces, then moving away and squinting, back and forth, playing with each piece like it was a brush stroke of paint. I was in the zone, creating art for art sake. Just writing about this artistic process makes me want to go play with my Fabrics
I remember a time when I said, "A quilt on the wall, What the heck would you want to put a quilt on the wall for? Oh My, I have had to eat my words a few times in my life. I have sense learned to say, " That is not where my interest is at this time." (Smile) I now know that I may be drawn to try something, that I might never have thought I would find myself doing, at any point in time. So is the Creative, Artistic nature of the beast.
I took a course a to do this Rose Quilted Wall Hanging. The course was called tessellating hydrangea,(How did I get a rose out of that?) I got a little off course I might say, (smile) which is pretty common for me. When the creative juices start to flow you never know where they will end up. The Tessellating Hydrangea, was a basic Basic tessellation, created by using sets of four small blocks and four protruding points that blended one quilt block into another(If you look at my quilted rose wall hanging, you may still be able to pick out a set of four small squares, that seem to look almost like a four leaf clover)(I see one just below the flower center and slightly to the right). The groupings of four blocks and points are intended to create the impression of the small flowers of a hydrangea, the bunches of small flowers make up a single hydrangea head.
What I did was treat each block and triangle point as an individual piece, I then arranged them on a quilters design wall to create the impression of a rose. This was a very good exercise for me, as I have always been caught up in to many details, This way all I had was small squares and triangle points, and with those my goal was to create the impression of a Rose. I had a lot of fun arranging and rearranging the bits and pieces, then moving away and squinting, back and forth, playing with each piece like it was a brush stroke of paint. I was in the zone, creating art for art sake. Just writing about this artistic process makes me want to go play with my Fabrics
Thursday, March 12, 2009
Me on my Wedding day

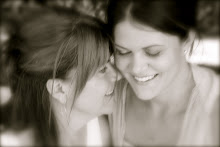
 This is a picture of me on the day of my second wedding. I was married for the second time on June 28th, 2008, I am married to a very unique sweet man. My first marriage was also to a very unique man, he lost a 17yr battle with cancer in Jan. 2001. I concider myself very fortunate to share my life with both of these men.
Wednesday, March 11, 2009
My First Blog

Hello everyone,
My name is Jami,
It would be very safe to say that I am not very seasoned at understanding the world wide web. However some things are made pretty simple for us, and seem to make sense at the time...?..... So I thought I would give this blogging thing a go.I have an education from the school of hard knocks, majoring in the Arts (Mostly just spending money on art stuff, that I never get finished) I am passionate about Knitting, quilting, and painting. I currently am a home based entrepreneur (Head down Butt up) Long arm quilting services for others. I been in this business since 1999, and was the brought the first long arm quilting machine to our town. I wouldn't even begin to guess how many quilts and quilted wall hanging I have stitched my doodles into. I only know I am sorry that I do not have a photograph journal of my works. I have only ever done the freehand custom quilting, I am artistic and I need an outlet for my creativity, when I am asked how I do it?, My simple answer is,"I doodle all over the quilt with thread, just like you would doodle with a pen or pencil, only I am using thread.
Smiles
Jami
Subscribe to:
Posts (Atom)